🔐 Introduction: Your Data, Your Responsibility
In an era where every click, message, and transaction leaves a digital trail, privacy is no longer a bonus: it is a basic requirement for any person or organization handling sensitive information.
Data breaches, mass surveillance, sale of browsing history, and behavioral profiling show that fully delegating your privacy to third parties (ISPs, “free” services, commercial VPN providers) is increasingly risky.
The logical alternative is to take back control: deploy your own Virtual Private Network (VPN) on a server you manage, with rules and logs you define.
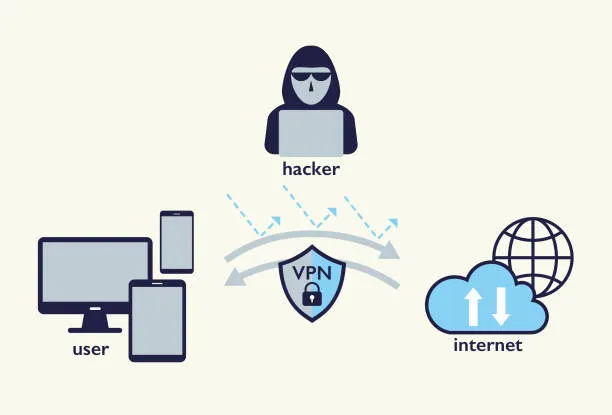
🤔 What Is a VPN and How Does It Really Work?
The Secure Tunnel Analogy
Imagine that sending data over the internet is like sending a postcard through regular mail:
- Without a VPN: anyone who handles the postcard can read its content (your ISP, the Wi-Fi owner, intermediate operators, some governments).
- With a VPN: you put the postcard inside an encrypted safe that only you and the VPN server can open.
All your traffic leaves your device encrypted, travels through a secure tunnel to your VPN server, and only then exits to the public internet. For third parties, your ISP only sees encrypted traffic to your VPN server, not what is inside.
Basic Technical Architecture
[Your Device] → [Encryption] → [VPN Server] → [Open Internet]
       ↑              ↑              ↑              ↑
    VPN client     Secure         Your secure     Destination
                    tunnel          node
At the network level, the VPN server acts as a secure gateway: everything leaving your device is encapsulated, encrypted, sent to the server, decrypted there, and only then forwarded to its final destination.
🚨 Why a Self-Hosted VPN Is Critical Today
1. Real Protection on Public Networks
On airport, coffee shop, or coworking Wi-Fi, any attacker on the same network can try to capture unencrypted traffic.
Tools like scapy, wifi-pumpkin, or mitmproxy make this trivial.
# Simple sniffing example on public WiFi (educational, not for production)
import scapy.all as scapy

def sniff_packets(interface):
    # Capture traffic from the interface
    packets = scapy.sniff(iface=interface, count=100)
    for packet in packets:
        if packet.haslayer(scapy.Raw):
            print(packet[scapy.Raw].load)

# With a properly configured VPN, traffic is end-to-end encrypted,
# so what is captured is not readable.
With your own VPN, even on hostile networks, the attacker only sees encrypted traffic, without being able to easily read the content.
2. Avoid ISP Throttling
Many ISPs apply traffic shaping or selective throttling to some services: streaming, gaming, P2P downloads, and more.
- With a VPN, all your traffic looks the same to the ISP.
- They cannot tell if it is video, gaming, corporate VPN, or backup traffic.
- Their ability to apply selective degradation policies is reduced.
3. Secure Access to Remote Resources
A self-hosted VPN lets you treat your home or office network as if you were physically there.
# Access your home network from anywhere
ssh user@your-vpn-server-ip

# Access internal services without exposing them to the public internet
mysql -h internal-server -u user -p
This is useful for:
- Administering internal servers.
- Accessing NAS, home automation, or cameras without opening ports to the world.
- Connecting headquarters, branch offices, or distributed teams.
4. Reducing Mass Surveillance and Profiling
Your browsing history, DNS queries, and usage patterns are extremely valuable:
- Governments: data retention laws and court orders.
- ISPs: user metrics and aggregate behavior.
- Adtech: fine-grained profiling for ads and segmentation.
With a well-configured self-hosted VPN, you reduce the visibility third parties have over your activity and centralize trust into a server you control.
🛠️ Step-by-Step Guide: Build Your VPN with WireGuard
WireGuard is currently one of the most modern and efficient options for building a VPN: small codebase, high performance, and relatively simple configuration.
Prerequisites
- VPS server (recommended: Ubuntu 20.04 or newer).
- SSH access as root or a user with
sudo. - Custom domain (optional but recommended for easier access).
qrencodeto generate configuration QR codes (sudo apt install qrencode).scapyfor the sniffing example (pip install scapyor distro package).requestsfor Python monitoring scripts (pip install requests).Flaskfor the web dashboard (pip install flask).fail2banto harden the server (sudo apt install fail2ban).
Step 1: Initial Server Setup
# Update system
sudo apt update && sudo apt upgrade -y

# Install WireGuard
sudo apt install wireguard -y

# Generate public/private keys
cd /etc/wireguard/
umask 077
wg genkey | tee privatekey | wg pubkey > publickey

# Configure server interface
cat > /etc/wireguard/wg0.conf << EOF
[Interface]
PrivateKey = $(cat privatekey)
Address = 10.0.0.1/24
ListenPort = 51820
SaveConfig = true

# NAT and forwarding rules when bringing the interface up
PostUp   = iptables -A FORWARD -i %i -j ACCEPT; \
           iptables -A FORWARD -o %i -j ACCEPT; \
           iptables -t nat -A POSTROUTING -o eth0 -j MASQUERADE
PostDown = iptables -D FORWARD -i %i -j ACCEPT; \
           iptables -D FORWARD -o %i -j ACCEPT; \
           iptables -t nat -D POSTROUTING -o eth0 -j MASQUERADE

# Client 1 - Your phone (example)
[Peer]
PublicKey = CLIENT_PUBLIC_KEY_HERE
AllowedIPs = 10.0.0.2/32
EOF
eth0 with the actual outbound network interface name of your server
(for example ens3, enp0s3, etc.). You can see it with ip addr.
Step 2: Enable Forwarding and Configure the Firewall
# Enable IP forwarding
echo "net.ipv4.ip_forward=1" | sudo tee -a /etc/sysctl.conf
sudo sysctl -p

# Configure UFW (firewall)
sudo ufw allow 51820/udp
sudo ufw allow ssh
sudo ufw enable

# Check firewall status
sudo ufw status
Step 3: Configure Clients Automatically
For mobile (Android/iOS) you just need the official WireGuard app and a QR code. A small script on the server makes it easier to create new peers.
#!/bin/bash
# add-client.sh - Script to add WireGuard clients
# Requires: qrencode (sudo apt install qrencode)

set -e

CLIENT_NAME="$1"
CLIENTS_DIR="/etc/wireguard/clients"

if [ -z "$CLIENT_NAME" ]; then
  echo "Usage: $0 CLIENT_NAME"
  exit 1
fi

# Ensure wg0 interface is active
if ! wg show wg0 &>/dev/null; then
  echo "Interface wg0 is not active. Start it with: sudo wg-quick up wg0"
  exit 1
fi

mkdir -p "${CLIENTS_DIR}"

# Simple internal IP assignment: 10.0.0.X
CLIENT_IP="10.0.0.$((2 + $(ls -1 ${CLIENTS_DIR}/*.conf 2>/dev/null | wc -l)))"

# Generate client keys
wg genkey | tee "${CLIENTS_DIR}/${CLIENT_NAME}_private.key" | wg pubkey > "${CLIENTS_DIR}/${CLIENT_NAME}_public.key"

# Create client configuration
cat > "${CLIENTS_DIR}/${CLIENT_NAME}.conf" << EOF
[Interface]
PrivateKey = $(cat "${CLIENTS_DIR}/${CLIENT_NAME}_private.key")
Address = ${CLIENT_IP}/24
DNS = 1.1.1.1, 8.8.8.8

[Peer]
PublicKey = $(cat /etc/wireguard/publickey)
Endpoint = $(curl -s ifconfig.me):51820
AllowedIPs = 0.0.0.0/0
EOF

# Add peer to server
wg set wg0 peer "$(cat "${CLIENTS_DIR}/${CLIENT_NAME}_public.key")" allowed-ips "${CLIENT_IP}/32"

# Generate QR for mobile clients
qrencode -t ansiutf8 < "${CLIENTS_DIR}/${CLIENT_NAME}.conf"

echo "Client ${CLIENT_NAME} configured with IP ${CLIENT_IP}"
From the WireGuard mobile app, you can scan the generated QR code and connect directly to your server.
Step 4: Start and Verify
# Bring the interface up
sudo wg-quick up wg0

# Enable automatic start on boot
sudo systemctl enable wg-quick@wg0

# Show interface and peers status
sudo wg show

# From the client, test connectivity
ping 10.0.0.1
🔧 Hardening Your VPN Security
1. Fail2Ban to React Against Repeated Attempts
Although WireGuard is quite resilient by design, you can use Fail2Ban to react to patterns of failed handshakes and block IPs that keep trying.
# Install fail2ban
sudo apt install fail2ban -y

# Configure jail for WireGuard
cat > /etc/fail2ban/jail.d/wireguard.conf << EOF
[wireguard]
enabled  = true
port     = 51820
protocol = udp
filter   = wireguard
logpath  = /var/log/syslog
maxretry = 3
bantime  = 3600
findtime = 600
EOF

# Filter for failed handshakes
cat > /etc/fail2ban/filter.d/wireguard.conf << EOF
[Definition]
failregex  = ^.*error.*Handshake for peer.*from.*<HOST>.*$
ignoreregex =
EOF

sudo systemctl restart fail2ban
2. Basic Monitoring Script
A small monitor can help you detect service outages, outbound connectivity issues, or inactive peers.
#!/usr/bin/env python3
# Requires: requests (pip install requests)

import subprocess
import requests
import logging
import time
from datetime import datetime

logging.basicConfig(
    filename="/var/log/vpn-monitor.log",
    level=logging.INFO,
    format="%(asctime)s - %(levelname)s - %(message)s"
)

class VPNMonitor:
    def __init__(self):
        self.alert_threshold = 3

    def check_wireguard_status(self):
        try:
            result = subprocess.run(
                ["wg", "show"],
                capture_output=True,
                text=True,
                timeout=10
            )
            return result.returncode == 0
        except Exception as exc:
            logging.error(f"Error checking WireGuard: {exc}")
            return False

    def check_internet_connectivity(self):
        try:
            response = requests.get("https://1.1.1.1", timeout=10)
            return response.status_code == 200
        except Exception:
            return False

    def get_connected_peers(self):
        try:
            result = subprocess.run(
                ["wg", "show", "wg0", "latest-handshakes"],
                capture_output=True,
                text=True
            )
            peers = {}
            for line in result.stdout.split("\n"):
                if line.strip():
                    peer_pubkey, handshake = line.split("\t")
                    peers[peer_pubkey] = int(handshake)
            return peers
        except Exception as exc:
            logging.error(f"Error getting peers: {exc}")
            return {}

    def monitor_loop(self):
        while True:
            if not self.check_wireguard_status():
                logging.critical("WireGuard service is down!")
                # Here you could integrate alerts (Telegram, email, etc.)

            if not self.check_internet_connectivity():
                logging.warning("Internet connectivity issue detected")

            peers = self.get_connected_peers()
            current_time = datetime.now().timestamp()

            for peer, handshake_time in peers.items():
                time_since_handshake = current_time - handshake_time
                if time_since_handshake > 180:
                    logging.warning(
                        f"Peer {peer[:8]}... no activity for {time_since_handshake:.0f}s"
                    )

            time.sleep(60)

if __name__ == "__main__":
    monitor = VPNMonitor()
    try:
        monitor.monitor_loop()
    except KeyboardInterrupt:
        logging.info("VPN monitor stopped by user")
3. Running WireGuard in Docker for Extra Isolation
If you prefer to isolate the service inside a container, a simple Docker Compose setup helps keep the environment more controlled.
version: "3.8"
services:
  wireguard:
    image: lscr.io/linuxserver/wireguard:latest
    container_name: wireguard
    cap_add:
      - NET_ADMIN
      - SYS_MODULE
    environment:
      - PUID=1000
      - PGID=1000
      - TZ=Europe/Madrid
      - SERVERURL=auto
      - SERVERPORT=51820
      - PEERS=3
      - PEERDNS=1.1.1.1
      - INTERNAL_SUBNET=10.0.0.0
    volumes:
      - /etc/wireguard:/config
      - /lib/modules:/lib/modules:ro
    ports:
      - 51820:51820/udp
    sysctls:
      - net.ipv4.conf.all.src_valid_mark=1
      - net.ipv4.ip_forward=1
    restart: unless-stopped
INTERNAL_SUBNET value is an example. Adjust that internal network so it does not
collide with other subnets you already use in your infrastructure (for example, avoid reusing your home/office LAN).
📊 Self-Hosted VPN vs Commercial Service
| Feature | Self-Hosted VPN | Commercial VPN |
|---|---|---|
| Cost | ≈ 5 USD/month (VPS) | 10–15 USD/month |
| Privacy | ✅ Full control over logs and configuration | ❌ Potential logs, unclear policies |
| Speed | ✅ Dedicated bandwidth | ⚠️ Shared servers |
| Locations | ⚠️ Limited to your servers | ✅ Many countries and regions |
| Configuration | ✅ Fully flexible | ❌ Predefined |
| Security | ✅ Transparent, auditable by you | ⚠️ Provider “black box” |
🚀 Advanced Use Cases
1. Company: Secure Access to Internal Resources
Instead of exposing databases, admin panels, or internal apps to the internet, you can force all access to go through the VPN.
[Headquarters] ←→ [VPN Server] ←→ [Remote Office]
      ↑                               ↑
  [Internal servers]              [Employees]
  [Databases]                     [Remote devices]
2. Developer: Secure Testing Environment
You can create a development environment where databases, Redis, and other services are only accessible inside the VPN network.
version: "3.8"
services:
  app:
    build: .
    environment:
      - DB_HOST=db.internal.vpn
      - REDIS_HOST=redis.internal.vpn
    networks:
      - vpn_network

  vpn:
    image: wireguard
    networks:
      - vpn_network
    volumes:
      - ./wg0.conf:/etc/wireguard/wg0.conf

networks:
  vpn_network:
    driver: bridge
3. Journalist or Remote Worker: Critical Communications
For high-risk profiles (journalists, activists, remote staff in censored countries) a well-configured self-hosted VPN is an additional protection layer.
import requests

def check_vpn_security():
    # Check external IP
    external_ip = requests.get("https://api.ipify.org").text
    print(f"External IP: {external_ip}")

    # This is illustrative; for DNS leak tests use dedicated services
    print("Use dnsleaktest.com or similar tools to verify DNS leaks.")
    print("Also check WebRTC leaks from your browser with specialized tools.")

check_vpn_security()
🔍 Monitoring and Maintenance
Simple Status Dashboard
A basic web dashboard lets you see if the service is running, which peers are connected, and how much traffic they are using.
# vpn-dashboard.py - Simple monitoring dashboard
# Requires: Flask (pip install flask) and templates/dashboard.html

from flask import Flask, render_template, jsonify
import subprocess

app = Flask(__name__)

@app.route("/")
def dashboard():
    return render_template("dashboard.html")

@app.route("/api/status")
def api_status():
    status = {
        "service": check_service(),
        "peers": get_peers()
    }
    return jsonify(status)

def check_service():
    result = subprocess.run(
        ["systemctl", "is-active", "wg-quick@wg0"],
        capture_output=True,
        text=True
    )
    return result.stdout.strip() == "active"

def get_peers():
    result = subprocess.run(
        ["wg", "show", "wg0", "dump"],
        capture_output=True,
        text=True
    )
    peers = []
    lines = result.stdout.split("\n")

    for line in lines[1:]:
        if line.strip():
            parts = line.split("\t")
            if len(parts) >= 7:
                peers.append({
                    "public_key": parts[0][:8] + "...",
                    "endpoint": parts[2],
                    "transfer_rx": parts[5],
                    "transfer_tx": parts[6],
                    "last_handshake": parts[4]
                })
    return peers

if __name__ == "__main__":
    app.run(host="127.0.0.1", port=5000)
💡 Additional Security Tips
1. Keep the Server Updated
# Configure automatic security updates
sudo dpkg-reconfigure -plow unattended-upgrades

# Keep WireGuard and the OS up to date
sudo apt update && sudo apt upgrade -y
2. Automate Configuration Backups
#!/bin/bash
# backup-vpn-config.sh
BACKUP_DIR="/home/backups/wireguard"
DATE=$(date +%Y%m%d_%H%M%S)

mkdir -p "${BACKUP_DIR}"
cp -r /etc/wireguard/ "${BACKUP_DIR}/wireguard_${DATE}"
tar -czf "${BACKUP_DIR}/wireguard_${DATE}.tar.gz" "${BACKUP_DIR}/wireguard_${DATE}"

# Clean old backups (keep last 7 days)
find "${BACKUP_DIR}" -name "*.tar.gz" -mtime +7 -delete

echo "Backup completed: ${BACKUP_DIR}/wireguard_${DATE}.tar.gz"
🎯 Conclusion: Take Control of Your Privacy
In a world where data is the new oil, protecting your personal and professional information is no longer optional: it is a digital survival requirement.
Running your own VPN gives you:
- ✅ Full control over your privacy and configuration.
- ✅ Transparency about what is logged and how.
- ✅ Flexibility to adapt it to your use cases.
- ✅ Cost-effective protection in the medium and long term.
- ✅ Deep learning in networking and security.
Do not wait for a breach or incident to react. Your privacy is your responsibility: starting with a self-hosted VPN is a concrete, measurable step to immediately improve your digital security.
📚 Additional Resources
This post provides a practical guide so you can implement your own VPN solution, understanding not only the how but also the why behind its importance in today’s digital landscape.